Tag: Recipe

Lemon Bars (Keto/Low Carb)

Lemon Bars Recipe from That Vibrant Life
Print
clock clock iconcutlery cutlery iconflag flag iconfolder folder iconinstagram instagram iconpinterest pinterest iconfacebook facebook iconprint print iconsquares squares iconheart heart iconheart solid heart solid icon

Lemon Bars (Keto/Low Carb)

5 Stars 4 Stars 3 Stars 2 Stars 1 Star No reviews
  • Author: Jessica Parker
  • Yield: 9 1x

Description

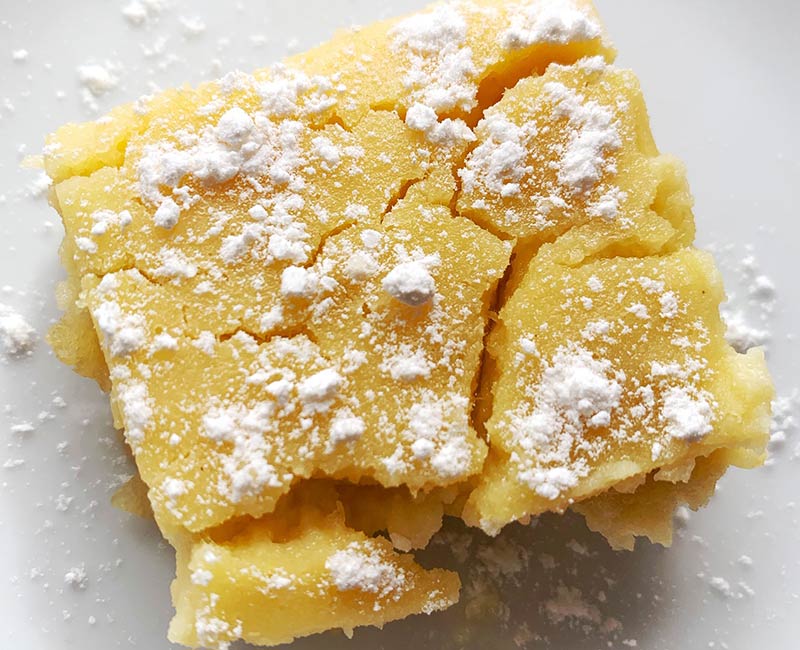
This has just taken the spot in my household for FAVORITE Keto dessert! I absolutely love lemon and it’s such a delicious treat for Springtime! This was far easier to make than I had anticipated.

For sweeteners, I try to stick with non GMO, organic if possible. Erythritol is a sugar alcohol from fermented fruit or veggies. I personally prefer it to the taste of stevia (stevia has a bitter aftertaste in my opinion). You can absolutely switch up the sweetener in any of these recipes to use something you prefer, just adjust the amount for taste.

I love to share Keto desserts on my page but also will caution you to not have them ALL the time! If you have goals for weight loss I would especially warn not to overdue the sweets as it will very easily keep you in that mode of craving sweet stuff!! Plus, too much of things like almond flour can boost carbs more than you would think.


Ingredients

Scale

Crust

  • 1 cup Almond Flour
  • ¼ cup Confectioners Erythritol
  • ¼ tsp Salt
  • ½ cup Butter, melted

Filling

  • 3 Lemons, juiced
  • 1 zest from one lemon
  • 1 tsp Vanilla
  • 3 Eggs, room temp (you can place them in warm water for a few minutes to warm!)
  • ¾ cup Confectioner’s Erythritol
  • ¾ cup Almond Flour

Topping

  • 1 tsp Confectioner’s Erythritol

Instructions

Crust

  1. Preheat oven to 350F & line an 8×8 casserole dish with parchment paper.
  2. Place the almond flour, confectioner’s erythritol, and salt in a large bowl. Mix well. Add the melted butter and stir until everything clumps together.
  3. Add the dough to the baking dish. Spread and flatten with a spatula making sure to get some along the sides of the dish.
  4. Bake for 15 minutes.
  5. Remove the crust and allow it to cool for 10 minutes before adding the filling.

Lemon Filling

  1. Combine the lemon juice, zest, vanilla, and eggs in a mixing bowl and blend well.
  2. Add the almond flour and Confectioner’s erythritol. Mix on medium speed until combined.
  3. Gently pour the filling over the crust, smoothing with a spatula until evenly distributed.
  4. Bake at 350 for 25 minutes or until set.
  5. Remove the pan from the oven and let cool for 30 minutes. Remove the bars by pulling on the edges of the parchment paper and lifting them from the pan.
  6. Sprinkle the convectioner’s erythritol for the topping evenly over the bars.
  7. Cut and serve! These are even more delicious chilled!

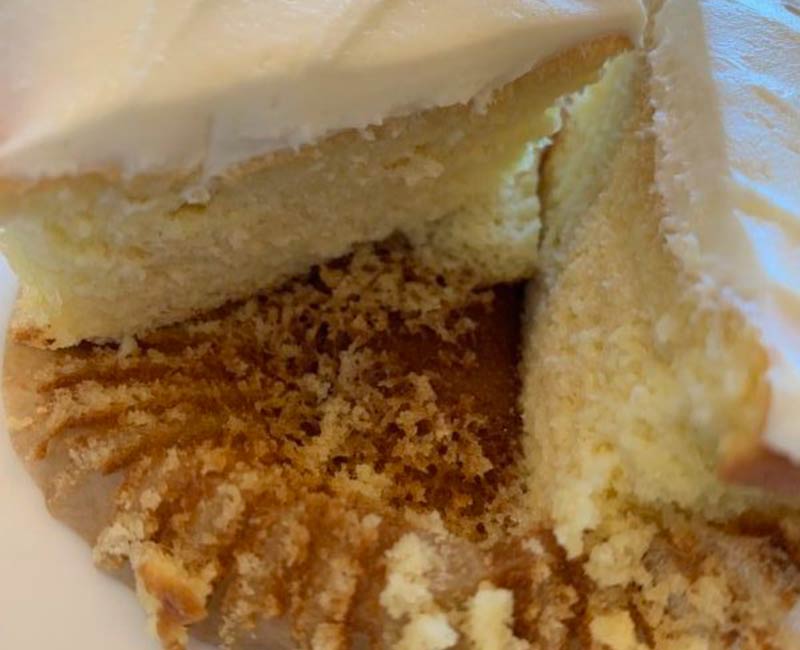
Vanilla Keto Cupcakes with Cream Cheese Frosting

Vanilla Keto Cupcakes with Cream Cheese Frosting Recipe from That Vibrant Life
Print
clock clock iconcutlery cutlery iconflag flag iconfolder folder iconinstagram instagram iconpinterest pinterest iconfacebook facebook iconprint print iconsquares squares iconheart heart iconheart solid heart solid icon

Vanilla Keto Cupcakes with Cream Cheese Frosting

5 Stars 4 Stars 3 Stars 2 Stars 1 Star No reviews
  • Author: Jessica Parker

Description

I used to bake ALL. THE. TIME. Then I started eating a more paleo inspired diet which then switched to keto. When I was paleo I did make a lot of paleo treats and found myself frustrated because my body was not responding well. I thought, hey, I cut out gluten, processed flour and sugar…what gives? But then I realized I was eating tons and tons of high sugar fruits and “healthy sugars”. This is actually what led me to dive into the ketogenic diet. After tons of research I thought I would “try it” and here I am, two years later, still keto!

I do not think it’s a good practice to have keto treats every day. It does seem to drive this desire for sweet further when we are always having sweet things even if they don’t spike our blood sugar. However, I do still love to bake and I LOVE to share a keto treat when there is a holiday or special event. These are one of those that even people who are not low carb or keto would love!

Recipe adapted from ketogenicgirl.com


Ingredients

Scale

Cupcakes

  • 1 cup Almond Flour
  • 2 tbsp Coconut Flour
  • 1 tsp Baking Powder
  • ½ tsp Sea Salt
  • 1 cup Heavy Whipping Cream
  • 2 Eggs
  • 4 Egg Yolks
  • ¼ cup Erythritol (or sweetner of choice; adjust amount as needed)
  • ½ tsp Vanilla Extract

Frosting

  • 8 oz Cream Cheese, softened just a little
  • 4 tbsp Powdered Erythritol
  • ¼ tsp Vanilla Extract

Instructions

  1. Preheat oven to 350F. Line muffing tin with 12 paper liners.
  2. In a medium sized bowl, whip the heavy whipping cream and eggs together until fluffy. Add in the yolks one at a time followed by the erythritol and vanilla extract; combine well.
  3. In a separate bowl mix together the almond and coconut flours, baking powder and sea salt. Add this gradually to the heavy whipping cream mixture and combine well.
  4. Distribute evenly into the 12 cupcake liners and bake for 20 minutes or until a toothpick inserted into the middle of a cupcake comes out clean.
  5. While cupcakes cool (make sure to cool them completely before frosting so the frosting doesn’t melt), mix the cream cheese, vanilla and powdered erythritol together in a bowl with a hand mixer until creamy and fluffy.
  6. Frost your cupcakes however your little heart desires and enjoy!


Nutrition

  • Serving Size: 12

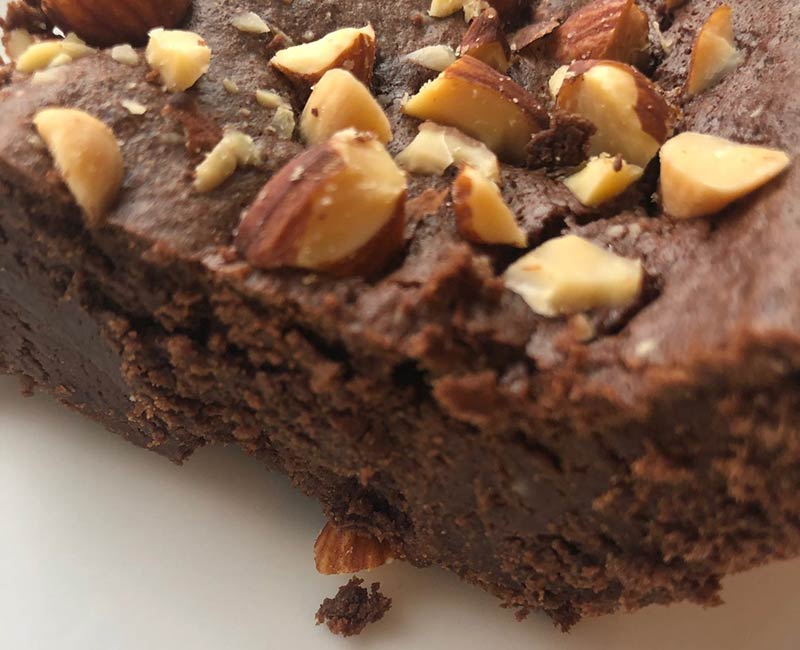
The BEST Keto Brownies

The BEST Keto Brownies Recipe from That Vibrant Life
Print
clock clock iconcutlery cutlery iconflag flag iconfolder folder iconinstagram instagram iconpinterest pinterest iconfacebook facebook iconprint print iconsquares squares iconheart heart iconheart solid heart solid icon

The BEST Keto Brownies

5 Stars 4 Stars 3 Stars 2 Stars 1 Star No reviews
  • Author: Jessica Parker

Description

These truly are the BEST Keto brownies I have tasted, hands down!! They are easy to make and you aren’t left feeling like “they were good, but not the real thing”. These brownies are rich, fudgy, they don’t have any kind of grainy texture from any of the keto flours (there is some almond flour but minimal). The flavor is amazing!


Ingredients

Scale
  • 8 oz Lily’s Chocolate (sweetened with stevia) or use a very dark chocolate 80% or more
  • 6 tbsp Butter
  • 2 tbsp Coconut oil
  • 3 Eggs
  • ¾ cup Erythritol (or sweetener of choice, adjust amount as needed)
  • 2 tbsp Almond Flour
  • ½ tsp Vanilla Extract
  • 1 pinch Sea Salt or Pink Himalayan Salt
  • 3 tbsp Nuts of choice, chopped
  • 2 tbsp Chocolate Chips (I used Lily’s) or Chopped Dark Chocolate
  • ½ tsp Baking Powder

Instructions

  1. Preheat the oven to 350F and grease an 8×8″ casserole dish with coconut oil or butter.
  2. Melt butter, coconut oil, and chocolate in the microwave or on the stove in a small pot. Stir well then set aside to cool. Mixture should be nice and smooth.
  3. Use a beater or mixer and combine the eggs, erythritol, vanilla extract, salt almond flour and baking powder.
  4. Carefully combine in the chocolate mixture until just combined.
  5. Spread the mixture evenly into the prepared casserole dish.
  6. Sprinkle with chopped nuts and/or chocolate (optional).
  7. Bake for 15 to 20 minutes or until set.
  8. Let cool for a few minutes then cut and enjoy!


Nutrition

  • Serving Size: 20

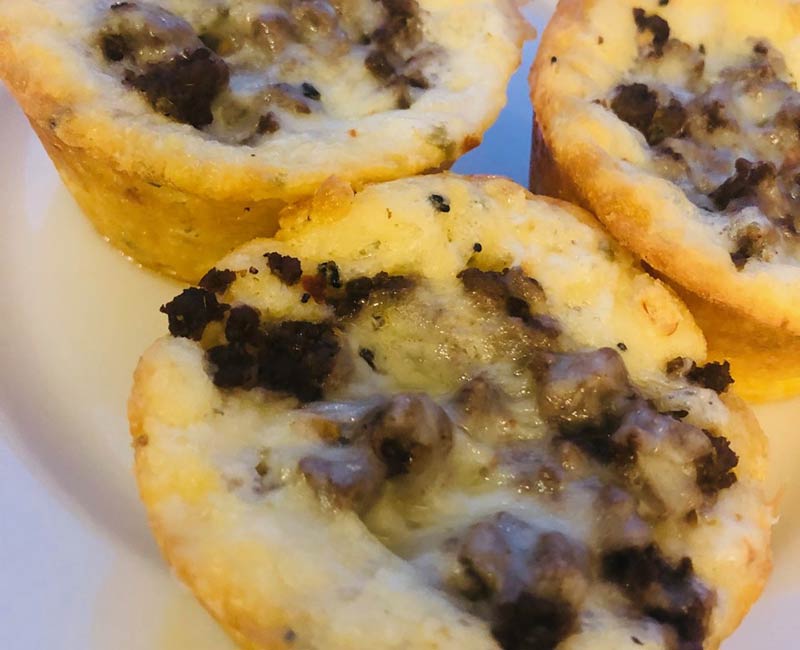
Keto Taco Cups

Keto Taco Cups Recipe from That Vibrant Life
Print
clock clock iconcutlery cutlery iconflag flag iconfolder folder iconinstagram instagram iconpinterest pinterest iconfacebook facebook iconprint print iconsquares squares iconheart heart iconheart solid heart solid icon

Keto Taco Cups

5 Stars 4 Stars 3 Stars 2 Stars 1 Star No reviews
  • Author: Jessica Parker

Description

This Taco Cup recipe is Keto friendly, but it is for sure one of those crowd pleasers (keto and non-keto alike)! It is quite the keto comfort food! If you miss bread, fat head dough is for sure my favorite way to satisfy that craving. It is so much like regular bread. It is a recipe I use constantly, especially if we have non-keto people over and I want to make something everyone can have. It’s great for rolls, buns, or things like this!


Ingredients

Scale

Fat Head Dough

  • 2 oz Cream Cheese
  • ¾ cup Shredded Mozzarella
  • 1 Egg, beaten
  • ¼ tsp Garlic Powder (or Trader Joes’ “Everything But The Bagel” Seasoning)
  • ⅓ cup Almond Flour
  • 2 tsp Baking Powder
  • ½ cup Shredded Cheese (I like to use Pepper Jack)

Filling

  • 1 lb Ground Beef (grass fed and finished)
  • 1 tbsp Chili Powder
  • ¼ tsp Garlic Powder
  • ¼ tsp Onion Powder
  • ⅛ tsp Crushed Red Pepper
  • ¼ tsp Oregano
  • ½ tsp Paprika
  • 1.50 tsp Ground Cumin
  • 1 tsp Sea Salt or Pink Himalayan Salt
  • 1 tsp Black Pepper
  • 1.50 cups Shredded Cheese (your choice)
  • Optional toppings: sour cream, salsa, hot sauce, avocado

Instructions

  1. Preheat oven to 350F.
  2. In a small bowl, add cream cheese and shredded mozzarella cheese. Microwave on high for 20 seconds at a time, stirring in between, until melted (don’t cook too long! It’s so important to stir really well every 20 seconds. It melts really fast!)
  3. In a separate bowl, whisk egg until beaten. Add dry ingredients and mix well.
  4. Combine cheese mixture with egg mixture. Then add in remaining shredded cheese and mix well.
  5. Put dough in the refrigerator to chill while you prepare the meat filling.

Filling

  1. Brown the ground beef and then add all of the seasonings and combine well.
  2. Remove the dough from the fridge and place it between 2 large piece of parchment paper. Roll the dough out until it’s fairly thin; about 1/4 inch thick.
  3. Grease a muffin tin with butter or coconut oil (just 6 of the cups need to be greased)
  4. Use a large mouthed jar or large circle cookie cutter to make cut 6 circles out of your dough. Then carefully press each of the circles into the individual muffin tin cups.
  5. Spoon meat mixture into each cup, dividing evenly then top each cup with shredded cheese.
  6. Bake at 350F for 10-15 minutes or until golden brown.
  7. Serve warm or cold! They are really good either way and a great snack! Top with whatever your little heart desires, they are good with or without added toppings!


Nutrition

  • Serving Size: 6

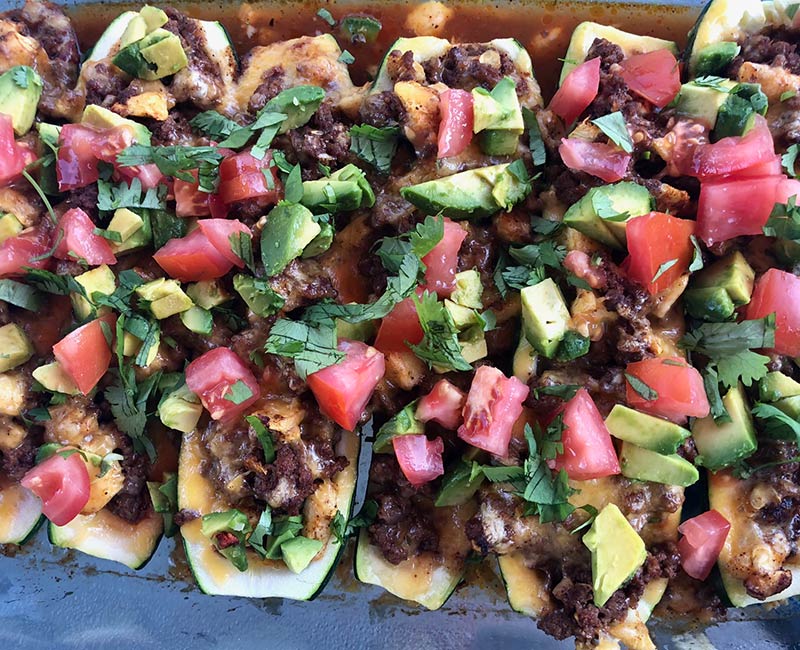
Taco Stuffed Zucchini Boats

Taco Stuffed Zucchini Boats Recipe from That Vibrant Life
Print
clock clock iconcutlery cutlery iconflag flag iconfolder folder iconinstagram instagram iconpinterest pinterest iconfacebook facebook iconprint print iconsquares squares iconheart heart iconheart solid heart solid icon

Taco Stuffed Zucchini Boats

5 Stars 4 Stars 3 Stars 2 Stars 1 Star No reviews
  • Author: Jessica Parker

Description

This is perfect if you are following a low carb protocol, but even if you aren’t it is delicious and everyone will love it! The flavor was outstanding and it was a pretty dinner to put together (win!). I also love that you can dress this up however you prefer with toppings to individualize for the fam. I am also not the biggest fan of leftovers, but this one was really good for lunch the next day!

Recipe adapted from The Recipe Critic


Ingredients

Scale
  • 3 Medium sized Zucchinis
  • 1 lb Ground Beef (grass fed and finished!)
  • 1 tbsp Chili Powder
  • ¼ tsp Garlic Powder
  • ¼ tsp Onion Powder
  • ¼ tsp Dried Oregano
  • ½ tsp Paprika
  • 1.50 tsp Ground Cumin
  • 1 tsp Sea Salt or Pink Himalayan Salt
  • 1 tsp Ground Black Pepper
  • 4 oz Tomato Sauce
  • ¼ cup Water
  • 1 cup Shredded Cheese *optional

Instructions

  1. Preheat oven to 400 degrees. Trim the ends off zucchini. Cut zucchini in half lengthwise and scoop out pulp, leaving ½-in. shells. Line up the zucchini in a 9×13 inch baking dish. Chop the pulp up into very small pieces and set aside.
  2. In a medium sized skillet add ground beef until no longer pink. Drain the excess grease. Add the reserved zucchini pulp and the chili powder, garlic powder, garlic powder, onion powder, dried oregano, paprika, cumin and salt and pepper to the ground beef. Add the tomato sauce and water and combine.
  3. Fill the zucchini boats evenly with the taco mixture. Top with shredded cheese. Bake uncovered for about 20 minutes or until zucchini is tender. Remove from oven and top with favorite toppings.
  4. *The cheese is totally optional. If you are dairy free or just trying to cut down on dairy like myself for hormone reasons, this recipe is super flavorful and really didn’t need the cheese! It’s just that good!


Nutrition

  • Serving Size: 6

Creamy Avocado Cilantro Lime Dressing

Creamy Avocado Cilantro Lime Dressing Recipe from That Vibrant Life
Print
clock clock iconcutlery cutlery iconflag flag iconfolder folder iconinstagram instagram iconpinterest pinterest iconfacebook facebook iconprint print iconsquares squares iconheart heart iconheart solid heart solid icon

Creamy Avocado Cilantro Lime Dressing

5 Stars 4 Stars 3 Stars 2 Stars 1 Star No reviews
  • Author: Jessica Parker

Description

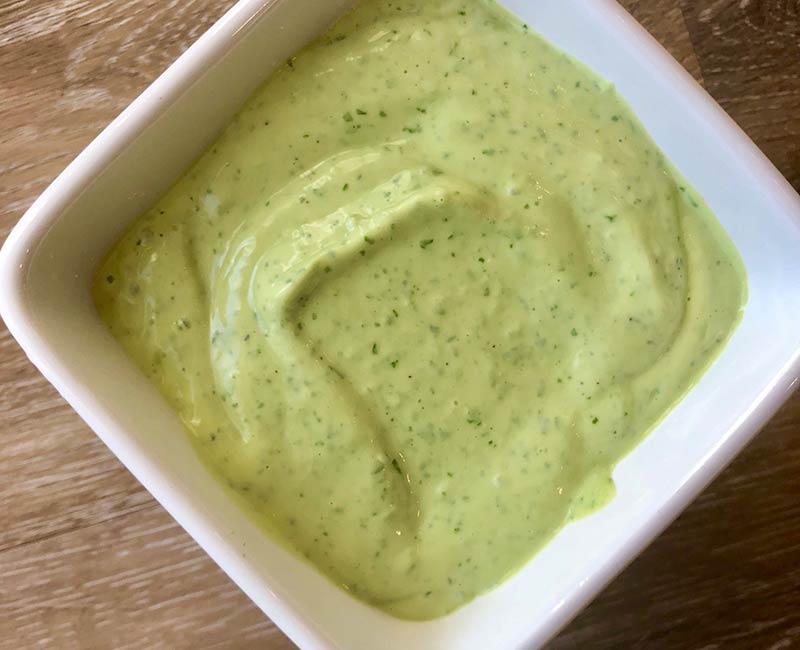
Looking for a delicious, creamy dressing that you can use on salads or for an addition to a meat or fish dish? Cilantro is one of my favorite herbs. It is a good source of fiber, vitamins A, C, E, K, calcium, iron, potassium, and magnesium. You can easily make this dairy free by opting for a dairy free plain yogurt.

Recipe adapted from www.gimmedelicious.com


Ingredients

Scale
  • 1 Avocado
  • 1 Clove Garlic
  • ¼ cup Cilantro, fresh, roughly chopped
  • ¼ cup Sour Cream or Plain Greek Yogut (full fat!)
  • 1 tbsp Fresh Lime or Lemon juice
  • 3 tbsp Olive Oil
  • ¼ tsp Sea Salt or Pink Himalayan Salt
  • ¼ tsp Ground Black Pepper
  • ⅓ cup Water

Instructions

  1. Place all ingredients in a food processor or blender.
  2. Blend well until mixture is nice and smooth. Use your 1/3 cup water to thin the dressing (add less or more depending on desired consistency).
  3. Store, covered, in the fridge for 1-2 weeks.


Nutrition

  • Serving Size: 8

Cauliflower “Mac” and Cheese (Keto/HFLC)

Cauliflower “Mac” and Cheese (Keto/HFLC) Recipe from That Vibrant Life
Print
clock clock iconcutlery cutlery iconflag flag iconfolder folder iconinstagram instagram iconpinterest pinterest iconfacebook facebook iconprint print iconsquares squares iconheart heart iconheart solid heart solid icon

Cauliflower “Mac” and Cheese (Keto/HFLC)

5 Stars 4 Stars 3 Stars 2 Stars 1 Star No reviews
  • Author: Jessica Parker

Description

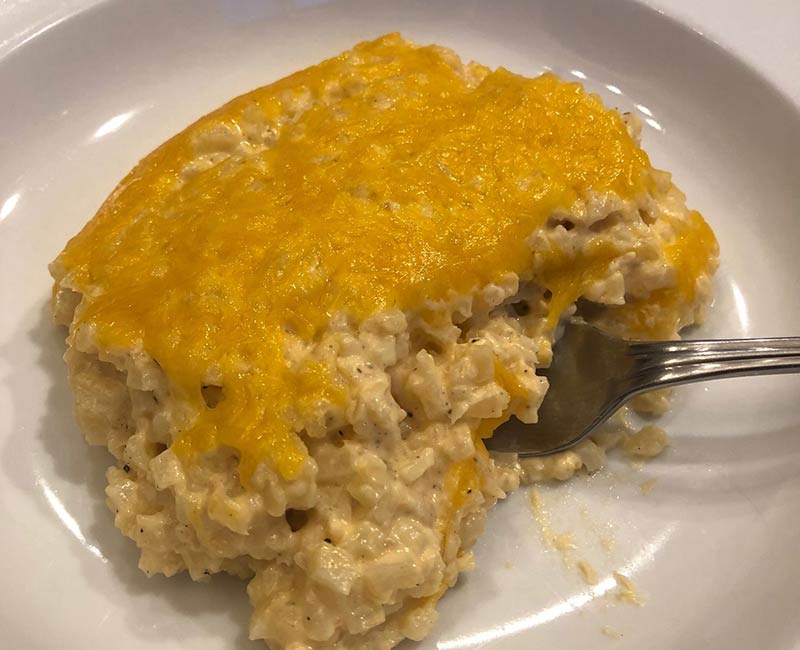
I have seen these cauliflower Mac and Cheese recipes using diced florets, but the first time I made it I had riced cauliflower on hand, so that’s what I used and it was so great (and easy) that it’s just how I make the recipe now!

This is the ultimate KETO comfort food!! Do be mindful and keep your serving size small because, although the carbs from cauliflower are nutrient dense, there are a lot of them if you are trying to keep your carbs fairly low. The good news is, there is also a fair amount of fiber in cauliflower, so it does help counteract the blood sugar/insulin reaction (which ultimately is why we are keeping the carbs low!!). So don’t avoid something like this altogether because you are afraid of the carbs (you’ll truly be missing out!); but again, keep the serving size limited.

If you have people in your fam who are NOT Keto, give this a try! I would bet they will love it too!!

A note on dairy: I don’t do dairy all the time because I notice if I have too much I have more symptoms of inflammation. However, in order to help support my hormones, when I do have dairy, I do my best to use hormone free!

This recipe was adapted from www.dontsweattherecipe.com


Ingredients

Scale
  • 1 Large head of cauliflower, cut in to small pieces (or use a food processer and make “riced” cauliflower!)
  • 1 cup Heavy Whipping Cream (hormone free)
  • 2 oz Cream Cheese (hormone free if you can find it)
  • 2 tsp Dijon mustard
  • 2 cups Shredded cheddar, divided (1.5 cups mixed in and 1/2 cup on top)
  • ¼ tsp Ground Black Pepper
  • ⅛ tsp Garlic Powder
  • ½ tsp Sea Salt or Pink Himalayan Salt

Instructions

  1. Preheat oven to 375F. Grease a 8×8 casserole dish with grass fed butter or coconut oil.
  2. Prepare your cauliflower pieces (or riced cauliflower) by steaming it until just getting tender. Transfer it to the prepared casserole dish and set aside.
  3. Bring the cream to a simmer in a small saucepan. Whisk the cream cheese and dijon mustard in until all is combined and smooth.
  4. Stir in 1.5 cups of the cheddar cheese, salt, pepper and garlic powder; whisk until the cheese melts (1-2 minutes). Add more salt and pepper as needed.
  5. Remove from heat, pour the cheese mixture over the cauliflower and stir to combine.
  6. Top the cauliflower “mac” and cheese with the remaining 1/2 cup of cheddar cheese and bake until starting to brown and bubble (around 15 minutes).
  7. Let sit for about 5 minutes and then serve. Enjoy!


Nutrition

  • Serving Size: 6

Italian Osso Bucco (Dutch Oven Recipe)

Italian Osso Bucco (Dutch Oven Recipe) Recipe from That Vibrant Life
Print
clock clock iconcutlery cutlery iconflag flag iconfolder folder iconinstagram instagram iconpinterest pinterest iconfacebook facebook iconprint print iconsquares squares iconheart heart iconheart solid heart solid icon

Italian Osso Bucco (Dutch Oven Recipe)

5 Stars 4 Stars 3 Stars 2 Stars 1 Star No reviews
  • Author: Jessica Parker

Description

I am typically pretty simple with my recipes because I don’t like complicated! But, with our grass fed beef business, I like to try all the different cuts and play with recipes. This was my first time with Osso Bucco, which is an Italian dish that is braised most often beef stock and a red wine. It is typically made from a veal shank, although the cut we offer is from beef shanks (you could also use thick-cut short ribs as an alternative).

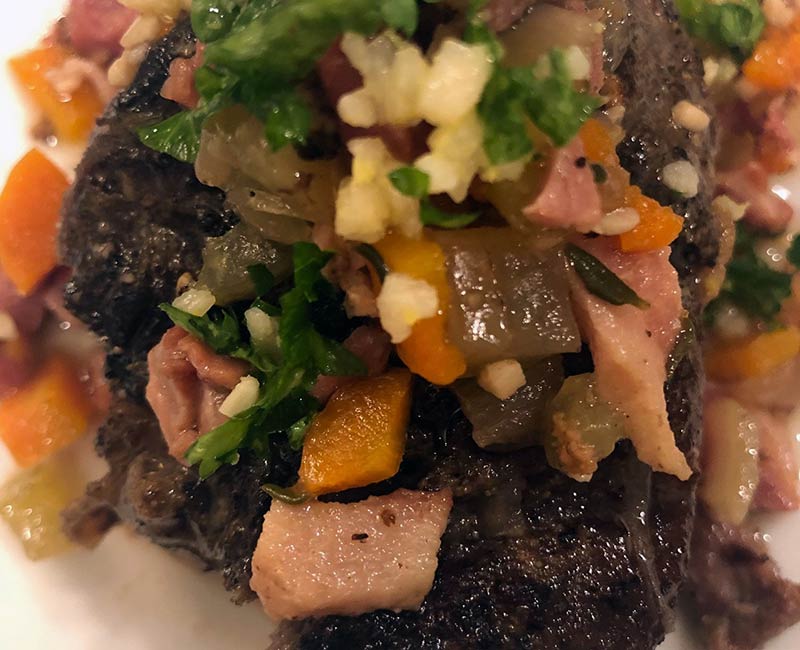
The flavor really was amazing! I LOVE the Gremolata that goes on top!!

Recipe adapted from simplerecipes.


Ingredients

Scale
  • ¼ lb Pancetta, diced
  • 3 lbs Osso Bucco
  • ½ cup Carrots, diced
  • ½ cup Celery, diced
  • 1 Onion, medium, diced
  • 2 tbsp Garlic cloves, chopped
  • 3 Thyme, 3-4 sprigs fresh or 1 tsp, dried
  • 1 cup Dry white wine
  • 2 cups Chicken Stock
  • Flour for dusting the meat, I used almond flour to keep it gluten free
  • Salt and Pepper as desired

Gremolata

  • 2 tbsp Italian Parsley, minced
  • 1 tbsp Lemon Zest
  • 2 Garlic Cloves, crushed and minced

Instructions

  1. Preheat oven to 325°F
  2. Brown the pancetta: Heat a dutch oven on the stove top over medium heat for about five minutes. Add pancetta to pan, cook, stirring occasionally.
  3. When the pancetta is crispy and most of the fat has rendered (about 5 minutes of cooking), remove the pancetta to a plate covered with some paper towel and set aside.
  4. If necessary, drain off all but two tablespoons of the fat from the pan.
  5. Cover the shanks in flour, brown in pan: Season the shank well with salt and pepper. Shake off any excess flour, and add the meat to the hot fat in the pan.
  6. Increase the heat to medium high and cook the meat on each side until well browned (about 5 minutes per side). Remove the meat to a plate, set aside.
  7. Sauté onions, carrots, celery: Add the onions, carrots, and celery to the dutch oven. Cook the onion mixture, stirring frequently, until the onions are translucent (about five minutes) and toss in the garlic and thyme.
  8. Continue cooking until the vegetables just begin to brown (about 10 minutes).
  9. Return shanks to pan, add wine and stock: Add the shanks and the pancetta back to the pan. Pour in the wine, and then add enough stock to come a little more than half way up the side of the shanks.
  10. Bring to a simmer. Cover the pan and put it in the oven to cook until the meat is tender, about an hour to an hour and a half.
  11. Make gremolata: Combine the gremolata ingredients, place in a separate small serving dish. Sprinkle with gremolata.

Keto Pecan Toffee

Keto Pecan Toffee Recipe from That Vibrant Life
Print
clock clock iconcutlery cutlery iconflag flag iconfolder folder iconinstagram instagram iconpinterest pinterest iconfacebook facebook iconprint print iconsquares squares iconheart heart iconheart solid heart solid icon

Keto Pecan Toffee

5 Stars 4 Stars 3 Stars 2 Stars 1 Star No reviews
  • Author: Jessica Parker

Description

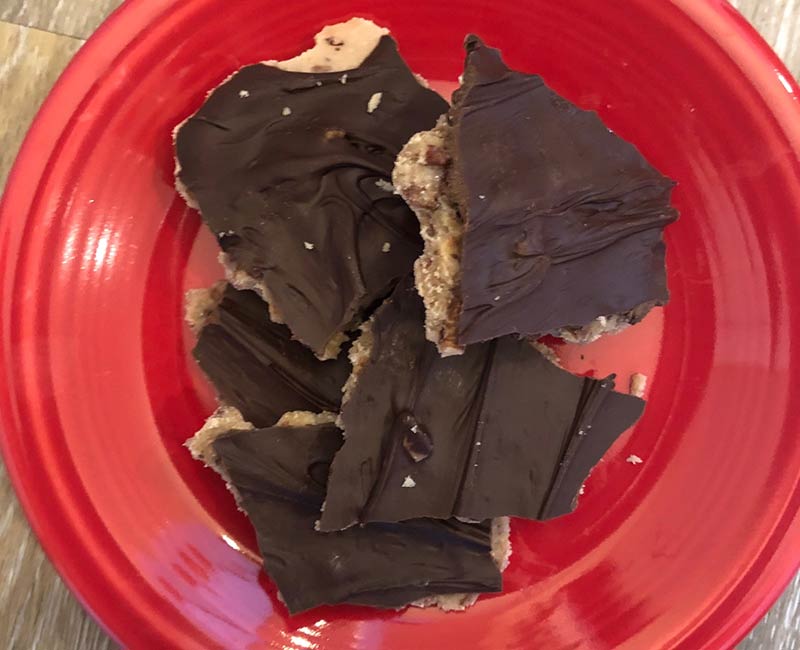
This stuff is ADDICTING. Consider yourselves warned!! Everyone, even non-keto people, love it! If you want to make sure it doesn’t disappear the second you make it, you might want to store some in the freezer!!

Have you ever had Lily’s chocolate?? It is a favorite treat of mine. It is sweetened with stevia and a really great option if you are keto, paleo or low carb. Their bars are delicious and they have tons of wonderful flavors! I love their chocolate chips as well, which is what I used for this recipe. I find them at Market of Choice, Natural Grocers and Whole Foods.


Ingredients

Scale
  • 5 tbsp Butter
  • 1 cup Pecans, chopped
  • ½ cup Erythritol (look for GMO free)
  • 5 tbsp Heavy Whipping Cream
  • ½ tsp Vanilla Extract
  • ¼ tsp Salt
  • 6 oz Lily’s Chocolate (sweetened with stevia)

Instructions

  1. Line a small baking sheet with parchment paper and grease it with butter or coconut oil.
  2. Chop pecans and set aside.
  3. Melt butter in a small saucepan over medium heat. Add chopped pecans and cook for about 5 minutes, until they are lightly toasted.
  4. Mix in the heavy whipping cream, vanilla, salt and erythritol. Cook until thick and golden. Stir continuously and make sure to not over cook! It should take 5-8 minutes.
  5. Pour pecan mix on the prepared baking sheet and spread evenly. Refrigerate until firm (about 30 minutes).
  6. Melt the lily’s chocolate either in 30 second increments in the microwave or over the stove. Pour the chocolate over the toffee and spread evenly. Put the pan in the freezer and let set (another 30 minutes).
  7. Break the sheet of Pecan Toffee up into about 24 pieces (they don’t have to be even, which makes them look kind of cool). Store in a covered container in the fridge or freezer.


Nutrition

  • Serving Size: 24

Pepperoncini Pot Roast

Pepperoncini Pot Roast Recipe from That Vibrant Life
Print
clock clock iconcutlery cutlery iconflag flag iconfolder folder iconinstagram instagram iconpinterest pinterest iconfacebook facebook iconprint print iconsquares squares iconheart heart iconheart solid heart solid icon

Pepperoncini Pot Roast

5 Stars 4 Stars 3 Stars 2 Stars 1 Star No reviews
  • Author: Jessica Parker

Description

The flavor in this roast is ridiculous. We are in LOVE with this! You really can’t get much easier than this, either. We used a roast from our own grass fed beef (my husband and I have a grass fed beef business in the Willamette Valley in Oregon).

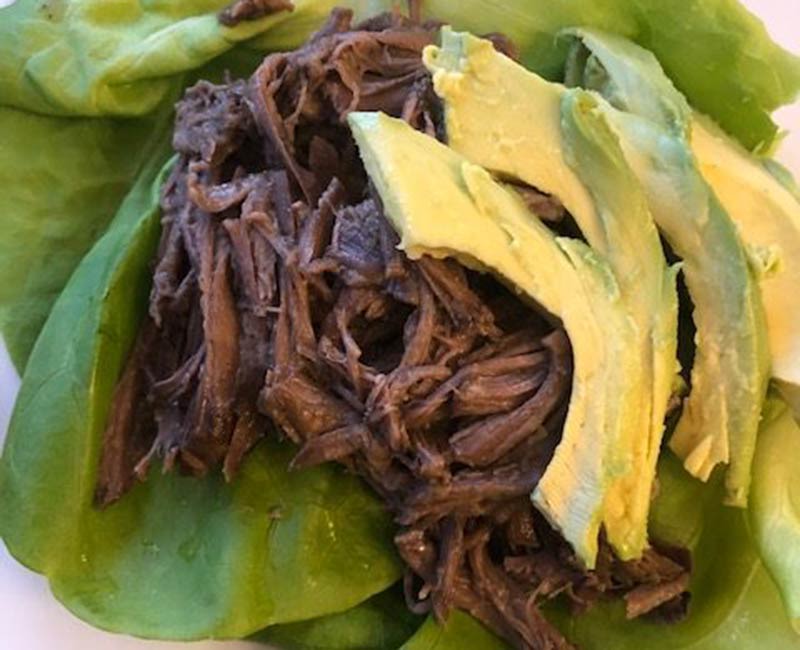
Although I have been big into using the crockpot this Fall, this recipe would be perfect any time of year. It shredded basically on it’s own when it was done and I put a big scoop in the middle of a butter lettuce leaf (love that stuff!). It makes for amazing taco meat! It would also be great along side mashed potatoes or cauliflower mash (if you’ve not tried that I encourage you to do so especially if you are following a ketogenic protocol).

If you are interested in grass fed and finished beef that you can order online and it will shipped to your door, please head over to www.oregonvalleyfarm.com!


Ingredients

Scale
  • 4 lbs Chuck Roast (grass fed & finished!)
  • 2 tbsp Olive oil
  • Salt & Pepper, to taste
  • 1 Packet ranch dressing mix
  • 1 Packet dry onion soup mix
  • 1 stick Butter (grass fed such as Kerrygold)
  • 8 Pepperonchini peppers, chopped and keep the juice!

Instructions

  1. Place roast in crock pot. Sprinkle the packets of ranch and onion soup mix over the raost. Top with the stick of butter, chopped pepperoncinis and pour the juice over the roast as well.
  2. Cover and cook on low for 8 hours (or on low for 2 hours and high for about 4 hours to speed up the process a bit but still have a delicious roast!). The meat will make it’s own juices along with the butter and juice from the peperoncinis.
  3. Once the roast is done, use two forks to shred the meat (this should be so easy, the meat will just fall apart for you). Either discard the pepperoncinis or mix them in with the shredded beef.
  4. Enjoy!


Nutrition

  • Serving Size: 6