Category: Dinner

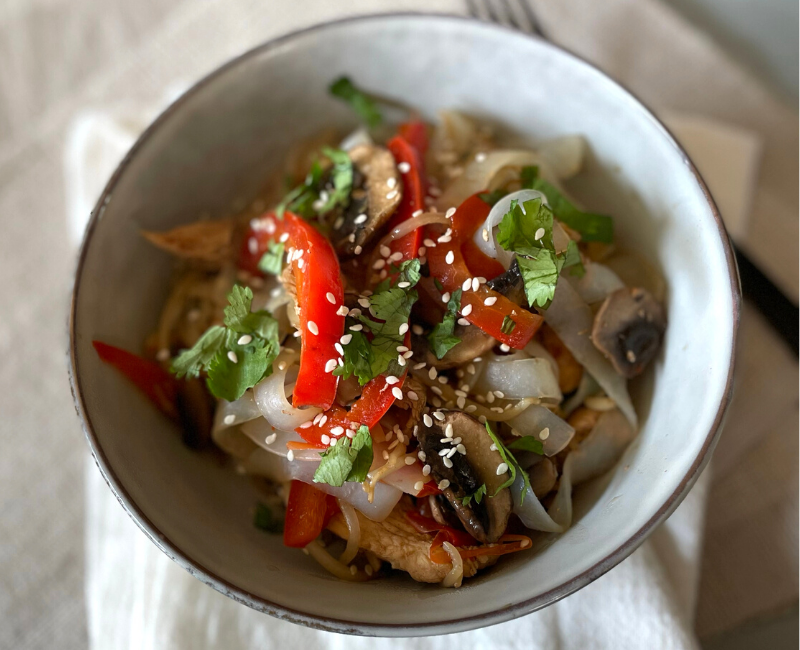
Chicken Lo Mein (low carb/gluten free)

Chicken Lo Mein
Print
clock clock iconcutlery cutlery iconflag flag iconfolder folder iconinstagram instagram iconpinterest pinterest iconfacebook facebook iconprint print iconsquares squares iconheart heart iconheart solid heart solid icon

Chicken Lo Mein (low carb/gluten free)

5 Stars 4 Stars 3 Stars 2 Stars 1 Star No reviews
  • Author: Jessica Parker
  • Yield: 4

Description

This is a delicious, nourishing meal that uses shirataki noodles to keep it low carb and gluten free. These are made from the konjac plant or konjac yam. They are relatively translucent and without flavor, however they take on the flavor of whatever dish they are used for. You can usually find these in the refrigerated produce section of a grocery store. Sometimes you can find them on the shelf in the Asian foods section. You can also find them on Thrive Market Online. Use my “friends” link to save 40% on your first order!

You can easily dial up the heat in this dish with crushed red pepper and extra sriracha. Or keep it milder if you prefer.


Ingredients

Chicken Marinade

·        3 Tbsp coconut aminos

·        2 Tbsp sriracha

·        1 Tbsp toasted sesame oil

·        2 green onions, sliced

·        2 garlic cloves, minced

·        1” piece ginger, minced

·        1 lb boneless, skinless chicken (pasture raised), thinly sliced

Stir-Fry

·        2 Tbsp avocado oil, divided

·        1 lb cremini mushrooms, sliced

·        1 medium red bell pepper, sliced thin

·        1 cup fresh bean sprouts, rinsed and dried

·        ¼ cup chicken bone broth

·        Four 7oz bags of shirataki noodles, rinsed and drained

·        2 green onions, sliced

·        ½ tsp pink Himalayan salt or sea salt (more to taste)

·        ½ tsp crushed red pepper flakes *optional

·        Cilantro, chopped *optional

·        1 Tbsp toasted sesame seeds

·        1 Tbsp toasted sesame oil


Instructions

Marinade for the Chicken

Add the coconut aminos, sriracha, sesame oil, green onions, garlic, and ginger in a shallow dish with the sliced chicken. Leave it in the refrigerator for no less than one hour or overnight; turning at least once.

Stir-Fry

Heat 1 Tbsp avocado oil in a large skillet over medium heat. Add the marinated chicken and sauté for 5 minutes, until browned. Remove chicken to a plate.

Add the remaining 1 Tbsp avocado oil to the skillet. Add mushrooms, bell pepper and bean sprouts; sauté for 5 minutes.

Add the chicken bone broth and simmer about 5 minutes, until liquid is reduced by about half.

Add shirataki noodles, green onions, salt and crushed red pepper. Stir and cook for a few minutes.

Serve with cilantro, sesame seeds and a drizzle of sesame oil.


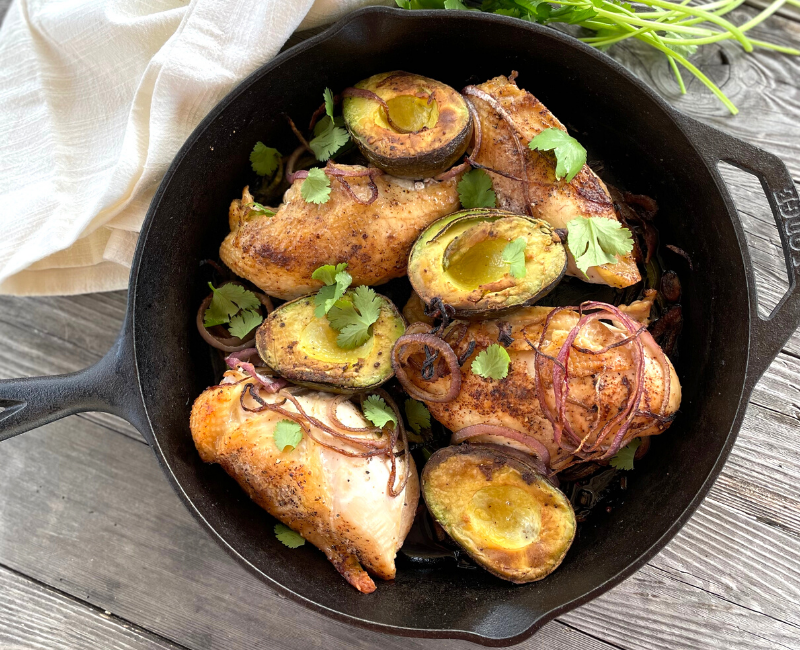
Chicken and Avocado Skillet (low carb/Keto)

Chicken Avocado Skillet
Print
clock clock iconcutlery cutlery iconflag flag iconfolder folder iconinstagram instagram iconpinterest pinterest iconfacebook facebook iconprint print iconsquares squares iconheart heart iconheart solid heart solid icon

Chicken and Avocado Skillet (low carb/Keto)

5 Stars 4 Stars 3 Stars 2 Stars 1 Star No reviews
  • Author: Jessica Parker

Description

Who says Keto has to be boring, or hard, or just all about bacon and cheese (but I DO love my bacon)?! This dish is freaking DELICIOUS!! This is an easy low carb meal with plenty of healthy fat and lots of protein!

Make sure you have a cast iron skillet for this! And I have to brag for a minute on how perfect my avocados were….I mean, how often does that happen?! It’s a moment to celebrate! Haha!


Ingredients

Scale
  • 2 Tbsp avocado oil (divided)
  • 4 boneless, skinless chicken breasts (pasture raised)
  • 1/2 tsp pink Himalayan salt 
  • 1/2 tsp ground black pepper
  • 1/2 tsp chile powder
  • 2 ripe avocados, sliced in half and pit removed
  • 1 red onion, sliced into thing rings
  • 2 green onions, diced
  • 1 poblano pepper, sliced
  • 3 Tbsp fresh squeezed lime juice (save some wedges for garnish as an option!)
  • 1 Tbsp coconut aminos (healthier version of soy sauce)
  • cilantro for topping/garnish *optional

Instructions

  1. Preheat the oven to 450F
  2. Heat large cast iron skillet over med-high. Add 1.5 Tbsp avocado oil to the pan, making sure to coat the whole pan.
  3. Season chicken breasts with salt, pepper and chile powder then add to the skillet. Cook 4 minutes on one side and one minute on the other. Remove chicken from the pan.
  4. Add remaining oil to the pan then add the avocados, face down. Cook for just a couple of minutes until the start to brown. Remove from the skillet.
  5. Next, add the sliced onion and sauté for a few minutes until soft and starting to caramelize. Keep the onions in the skillet.
  6. Add the poblano pepper and green onions to the skillet and cook for a few minutes. Add lime juice and coconut aminos. Combine well.
  7. Add the chicken and avocados (face up) back into the skillet amongst the onion mixture.
  8. Put the skillet in the preheated oven and bake for 7ish minutes (make sure the chicken reaches 165F internally)
  9. Remove from the oven and sprinkle with more salt, if desired and with the cilantro and lime (optional).

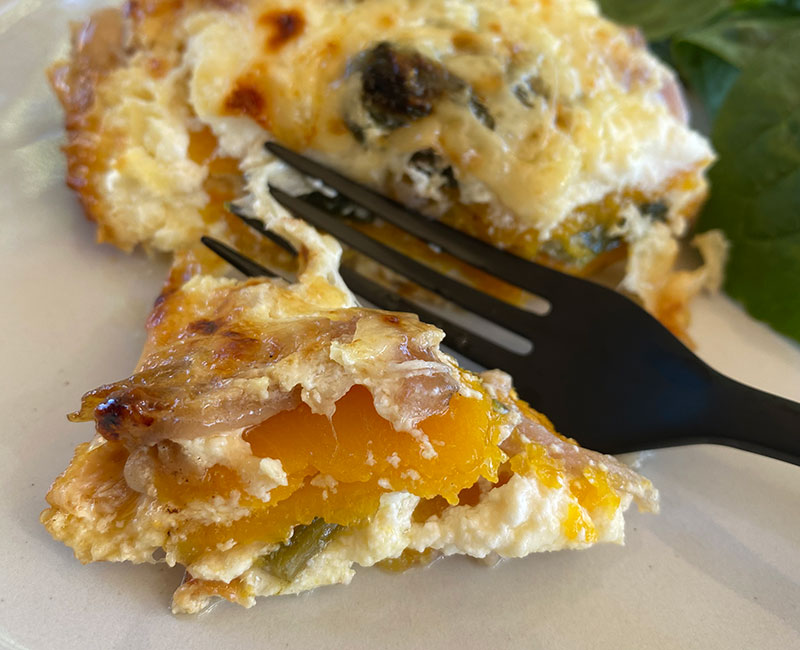
Butternut Squash Lasagna

Butternut Squash Lasagna Recipe from That Vibrant Life
Print
clock clock iconcutlery cutlery iconflag flag iconfolder folder iconinstagram instagram iconpinterest pinterest iconfacebook facebook iconprint print iconsquares squares iconheart heart iconheart solid heart solid icon

Butternut Squash Lasagna

5 Stars 4 Stars 3 Stars 2 Stars 1 Star No reviews
  • Author: Jessica Parker

Description

This is a great twist on the regular lasagna, especially if you love butternut squash! I was not looking forward to cutting into this squash since they are so firm, but it really was a lot easier to deal with than I had imagined. No need to soften it up first. This is for sure a low carb comfort food dish!


Note: this will be a little higher in carb than some other dishes because of the starchy squash. I would reserve this for a day when you are boosting your healthy carbs a bit (carb cycling) which I think is a very useful thing to practice!


Ingredients

Scale
  • 1 Tbsp avocado oil
  • 1 red onion, sliced in thin half rings
  • 6 oz baby spinach
  • ¾ cup whole fat, plain Greek yogurt
  • 1/3 cup heavy whipping cream
  • 3 oz provolone cheese, cut into little pieces
  • 1 tsp sea salt or pink Himalayan salt
  • 2 eggs
  • 1 butternut squash
  • 1 cup ricotta cheese
  • 2 oz Gruyere cheese, grated (about ½ cup)
  • Avocado oil to grease casserole dish

Instructions

  1. Preheat oven to 350F. Heat oil in large skillet over med-high. Add onion and garlic and sauté about 4 minutes. Add the spinach and sauté just until spinach is wilty. Remove from heat. Put yogurt, heavy whipping cream and provolone into a blender or food processer; blend just 20 seconds. Add salt and eggs, blend 1 full minute.
  2. Cut the round bulb off the bottom of the squash. Peel the neck (the longer part of the squash) with a vegetable peeler. Cut into thin 1/8th inch rounds. Steam for several minutes in a pot on the stove just until the round start to soften a bit.
  3. Coat a 8 inch square casserole dish with avocado oil then spread ½ cup of the yogurt, heavy whipping cream mixture on the bottom of the dish.
  4. Make one layer with squash rounds over the yogurt mixture, making sure to slightly overlap the rounds.
  5. Top with 1/3 cup ricotta cheese then 1/3 of the spinach mixture and 1/3 of the remaining yogurt mixture.  Repeat these layers twice and end with what is left of the yogurt mixture.
  6. Sprinkle the Gruyere cheese over the lasagna, cover with foil and bake at 350F for 50 minutes.
  7. Remove the foil, turn the broiler on and broil for a few minutes, or until lasagna starts turning golden brown (this will happen pretty fast, so keep an eye on it).
  8. Remove from oven and let sit for about 20 minutes before cutting into it and serving. Enjoy!

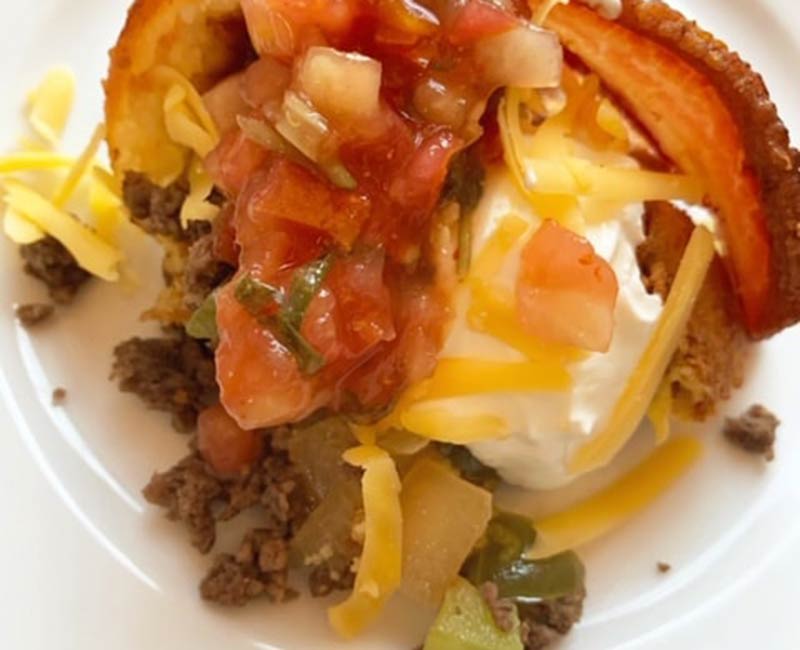
Low Carb Bacon Wrapped Burrito

Low Carb Bacon Wrapped Burrito Recipe from That Vibrant Life
Print
clock clock iconcutlery cutlery iconflag flag iconfolder folder iconinstagram instagram iconpinterest pinterest iconfacebook facebook iconprint print iconsquares squares iconheart heart iconheart solid heart solid icon

Low Carb Bacon Wrapped Burrito

5 Stars 4 Stars 3 Stars 2 Stars 1 Star No reviews
  • Author: Jessica Parker
  • Yield: 8 1x

Description

This is a delicious recipe using Fathead dough. For you who follow a ketogenic protocol, you probably know exactly what I’m talking about! It’s one of the best bread/roll/pizza crust alternatives and is loved by keto and non-keto people alike! I will caution you, though; if you are a non-dairy consumer then perhaps skip the fathead wrap and make a bacon burrito bowl instead! OR you could substitute with a Siete tortilla/wrap (Whole Foods carries these or you can order them online).


Ingredients

Scale

Fathead Dough

  • 6 oz Shredded Mozzarella
  • 1 oz Cream Cheese, full fat
  • 1 Egg
  • ½ cup Almond Flour
  • 2 tsp Baking Powder
  • ⅛ tsp Pink Himalayan Salt

Bacon Layer and Filling

  • 24 Slices Bacon (pasture raised)
  • 1 lb Ground Beef (grass fed and finished)
  • 1 Yellow Onion, medium
  • 1 Green Bell Pepper, medium
  • 4 oz Cheddar Cheese

Instructions

  1. Make the fathead dough and place in the refrigerator while you prepare the rest of the ingredients (it’s much easier to work with when chilled!).
  2. Partially cook the bacon in the oven. Be very careful with this step because if you cook it too much it will get overcooked in the next steps! Make sure it’s not at all crispy during this step!
  3. Preheat the oven to 400F.
  4. Brown the ground beef on the stove.
  5. Saute the onion and bell pepper until soft and set aside.
  6. Line a 13×18″ baking pan or 2, 9×13″ pans with parchment paper.
  7. On a separate piece of parchment paper, roll the fathead dough out to about 1/4″ thickness in a rectangle.
  8. Bake the fathead dough just slightly, about 10 minutes. Let cool a little.
  9. On the pan lined with parchment paper, lay out the strips of bacon so they are slightly overlapping.
  10. Add the fathead dough crust on top of the bacon.
  11. Layer the ground beef and onion/green pepper mixture over the fathead crust.
  12. Gently roll the crust and filling until it’s closed like a burrito and then wrap the bacon around the whole thing, crossing the ends to seal the burrito.
  13. Bake about 30 minutes or until golden brown.
  14. Add whatever toppings you desire (sour cream, salsa, cheese, olives, chives, etc)!

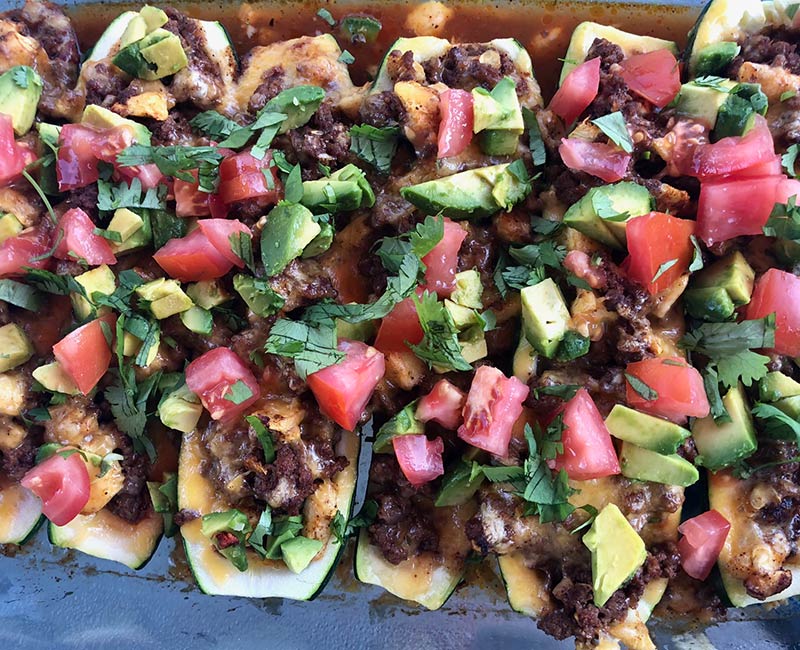
Taco Stuffed Zucchini Boats

Taco Stuffed Zucchini Boats Recipe from That Vibrant Life
Print
clock clock iconcutlery cutlery iconflag flag iconfolder folder iconinstagram instagram iconpinterest pinterest iconfacebook facebook iconprint print iconsquares squares iconheart heart iconheart solid heart solid icon

Taco Stuffed Zucchini Boats

5 Stars 4 Stars 3 Stars 2 Stars 1 Star No reviews
  • Author: Jessica Parker

Description

This is perfect if you are following a low carb protocol, but even if you aren’t it is delicious and everyone will love it! The flavor was outstanding and it was a pretty dinner to put together (win!). I also love that you can dress this up however you prefer with toppings to individualize for the fam. I am also not the biggest fan of leftovers, but this one was really good for lunch the next day!

Recipe adapted from The Recipe Critic


Ingredients

Scale
  • 3 Medium sized Zucchinis
  • 1 lb Ground Beef (grass fed and finished!)
  • 1 tbsp Chili Powder
  • ¼ tsp Garlic Powder
  • ¼ tsp Onion Powder
  • ¼ tsp Dried Oregano
  • ½ tsp Paprika
  • 1.50 tsp Ground Cumin
  • 1 tsp Sea Salt or Pink Himalayan Salt
  • 1 tsp Ground Black Pepper
  • 4 oz Tomato Sauce
  • ¼ cup Water
  • 1 cup Shredded Cheese *optional

Instructions

  1. Preheat oven to 400 degrees. Trim the ends off zucchini. Cut zucchini in half lengthwise and scoop out pulp, leaving ½-in. shells. Line up the zucchini in a 9×13 inch baking dish. Chop the pulp up into very small pieces and set aside.
  2. In a medium sized skillet add ground beef until no longer pink. Drain the excess grease. Add the reserved zucchini pulp and the chili powder, garlic powder, garlic powder, onion powder, dried oregano, paprika, cumin and salt and pepper to the ground beef. Add the tomato sauce and water and combine.
  3. Fill the zucchini boats evenly with the taco mixture. Top with shredded cheese. Bake uncovered for about 20 minutes or until zucchini is tender. Remove from oven and top with favorite toppings.
  4. *The cheese is totally optional. If you are dairy free or just trying to cut down on dairy like myself for hormone reasons, this recipe is super flavorful and really didn’t need the cheese! It’s just that good!


Nutrition

  • Serving Size: 6

Italian Osso Bucco (Dutch Oven Recipe)

Italian Osso Bucco (Dutch Oven Recipe) Recipe from That Vibrant Life
Print
clock clock iconcutlery cutlery iconflag flag iconfolder folder iconinstagram instagram iconpinterest pinterest iconfacebook facebook iconprint print iconsquares squares iconheart heart iconheart solid heart solid icon

Italian Osso Bucco (Dutch Oven Recipe)

5 Stars 4 Stars 3 Stars 2 Stars 1 Star No reviews
  • Author: Jessica Parker

Description

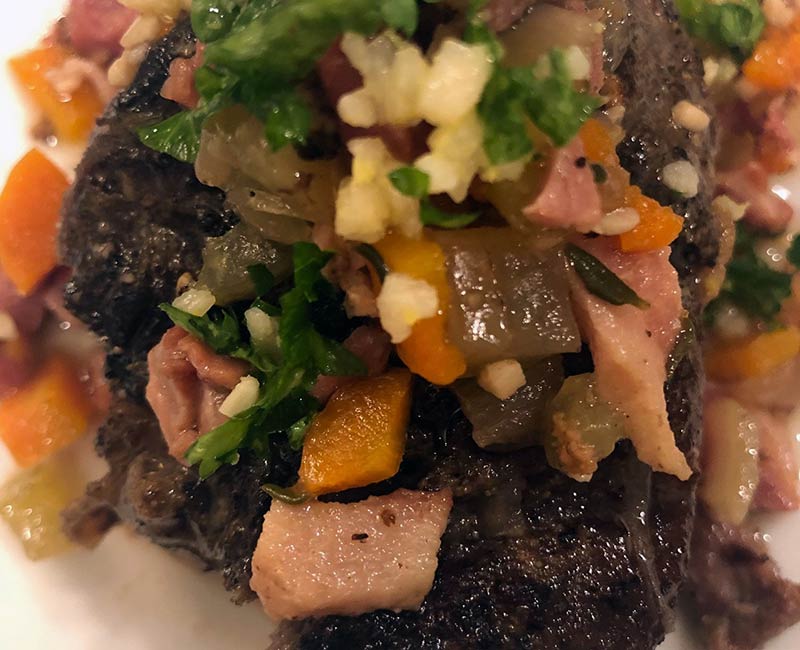
I am typically pretty simple with my recipes because I don’t like complicated! But, with our grass fed beef business, I like to try all the different cuts and play with recipes. This was my first time with Osso Bucco, which is an Italian dish that is braised most often beef stock and a red wine. It is typically made from a veal shank, although the cut we offer is from beef shanks (you could also use thick-cut short ribs as an alternative).

The flavor really was amazing! I LOVE the Gremolata that goes on top!!

Recipe adapted from simplerecipes.


Ingredients

Scale
  • ¼ lb Pancetta, diced
  • 3 lbs Osso Bucco
  • ½ cup Carrots, diced
  • ½ cup Celery, diced
  • 1 Onion, medium, diced
  • 2 tbsp Garlic cloves, chopped
  • 3 Thyme, 3-4 sprigs fresh or 1 tsp, dried
  • 1 cup Dry white wine
  • 2 cups Chicken Stock
  • Flour for dusting the meat, I used almond flour to keep it gluten free
  • Salt and Pepper as desired

Gremolata

  • 2 tbsp Italian Parsley, minced
  • 1 tbsp Lemon Zest
  • 2 Garlic Cloves, crushed and minced

Instructions

  1. Preheat oven to 325°F
  2. Brown the pancetta: Heat a dutch oven on the stove top over medium heat for about five minutes. Add pancetta to pan, cook, stirring occasionally.
  3. When the pancetta is crispy and most of the fat has rendered (about 5 minutes of cooking), remove the pancetta to a plate covered with some paper towel and set aside.
  4. If necessary, drain off all but two tablespoons of the fat from the pan.
  5. Cover the shanks in flour, brown in pan: Season the shank well with salt and pepper. Shake off any excess flour, and add the meat to the hot fat in the pan.
  6. Increase the heat to medium high and cook the meat on each side until well browned (about 5 minutes per side). Remove the meat to a plate, set aside.
  7. Sauté onions, carrots, celery: Add the onions, carrots, and celery to the dutch oven. Cook the onion mixture, stirring frequently, until the onions are translucent (about five minutes) and toss in the garlic and thyme.
  8. Continue cooking until the vegetables just begin to brown (about 10 minutes).
  9. Return shanks to pan, add wine and stock: Add the shanks and the pancetta back to the pan. Pour in the wine, and then add enough stock to come a little more than half way up the side of the shanks.
  10. Bring to a simmer. Cover the pan and put it in the oven to cook until the meat is tender, about an hour to an hour and a half.
  11. Make gremolata: Combine the gremolata ingredients, place in a separate small serving dish. Sprinkle with gremolata.

Pepperoncini Pot Roast

Pepperoncini Pot Roast Recipe from That Vibrant Life
Print
clock clock iconcutlery cutlery iconflag flag iconfolder folder iconinstagram instagram iconpinterest pinterest iconfacebook facebook iconprint print iconsquares squares iconheart heart iconheart solid heart solid icon

Pepperoncini Pot Roast

5 Stars 4 Stars 3 Stars 2 Stars 1 Star No reviews
  • Author: Jessica Parker

Description

The flavor in this roast is ridiculous. We are in LOVE with this! You really can’t get much easier than this, either. We used a roast from our own grass fed beef (my husband and I have a grass fed beef business in the Willamette Valley in Oregon).

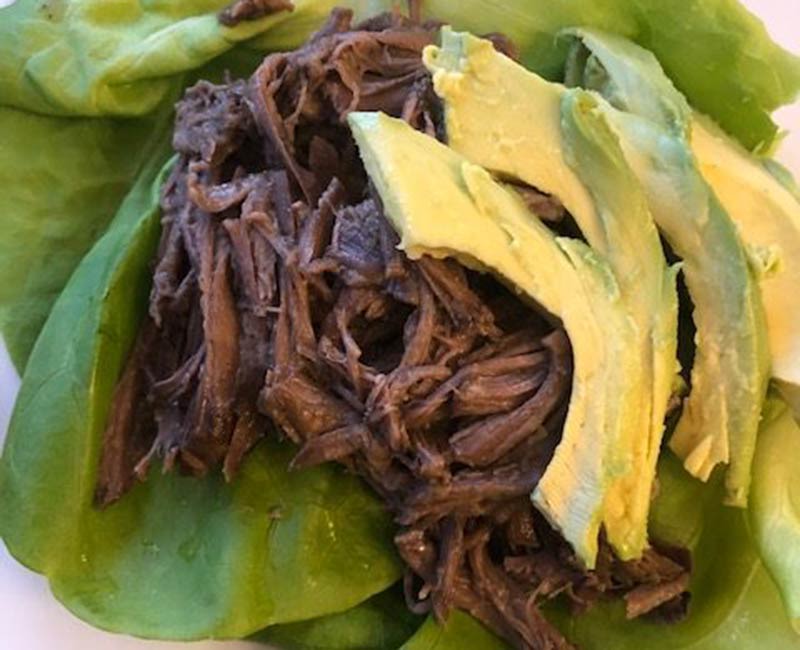
Although I have been big into using the crockpot this Fall, this recipe would be perfect any time of year. It shredded basically on it’s own when it was done and I put a big scoop in the middle of a butter lettuce leaf (love that stuff!). It makes for amazing taco meat! It would also be great along side mashed potatoes or cauliflower mash (if you’ve not tried that I encourage you to do so especially if you are following a ketogenic protocol).

If you are interested in grass fed and finished beef that you can order online and it will shipped to your door, please head over to www.oregonvalleyfarm.com!


Ingredients

Scale
  • 4 lbs Chuck Roast (grass fed & finished!)
  • 2 tbsp Olive oil
  • Salt & Pepper, to taste
  • 1 Packet ranch dressing mix
  • 1 Packet dry onion soup mix
  • 1 stick Butter (grass fed such as Kerrygold)
  • 8 Pepperonchini peppers, chopped and keep the juice!

Instructions

  1. Place roast in crock pot. Sprinkle the packets of ranch and onion soup mix over the raost. Top with the stick of butter, chopped pepperoncinis and pour the juice over the roast as well.
  2. Cover and cook on low for 8 hours (or on low for 2 hours and high for about 4 hours to speed up the process a bit but still have a delicious roast!). The meat will make it’s own juices along with the butter and juice from the peperoncinis.
  3. Once the roast is done, use two forks to shred the meat (this should be so easy, the meat will just fall apart for you). Either discard the pepperoncinis or mix them in with the shredded beef.
  4. Enjoy!


Nutrition

  • Serving Size: 6

Low Carb Shepard’s Pie (with Cauliflower Mash)

Low Carb Shepard’s Pie (with Cauliflower Mash) Recipe from That Vibrant Life
Print
clock clock iconcutlery cutlery iconflag flag iconfolder folder iconinstagram instagram iconpinterest pinterest iconfacebook facebook iconprint print iconsquares squares iconheart heart iconheart solid heart solid icon

Low Carb Shepard’s Pie (with Cauliflower Mash)

5 Stars 4 Stars 3 Stars 2 Stars 1 Star No reviews
  • Author: Jessica Parker

Description

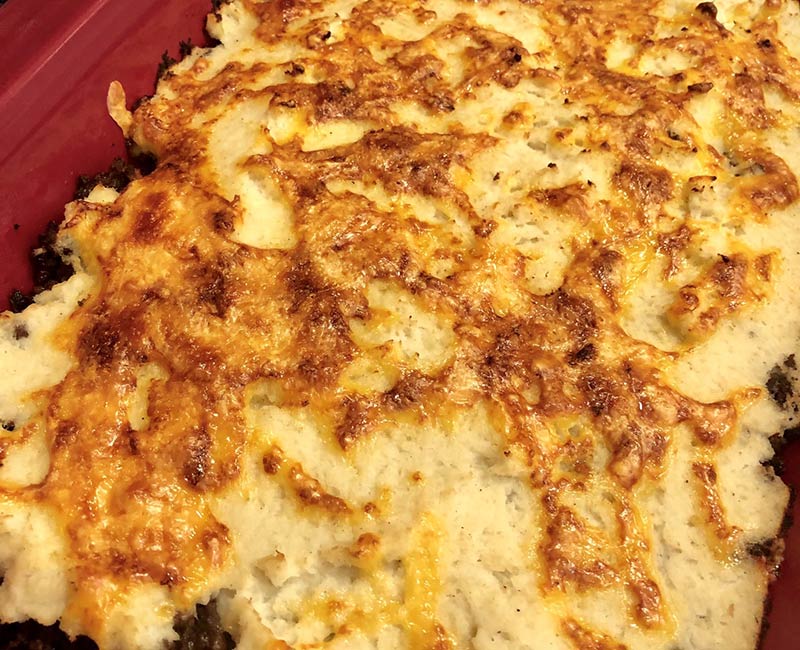
This is (low carb) comfort food at it’s finest! If you have not yet delved into the world of cauliflower instead of potatoes; I highly encourage you to do so! I was hesitant. I’ve historically been the person who would rather just have the real thing. This, though, will not leave you disappointed!

Some people use lamb in Shepard’s Pie and you can absolutely substitute some or all of the ground beef in this recipe with lamb. I prefer beef so that’s what I used.

Also, the only dairy (aside from the butter in the cauliflower which can be replaced with Ghee) is the cheddar cheese on top. You can easily omit this for a dairy free option and it would still be delicious, OR use a dairy free cheese!


Ingredients

Scale

Beef Layer

  • 2 lbs Ground Beef (grass fed)
  • ½ cup Onion, chopped
  • 1 tsp Salt
  • ½ tsp Ground Pepper
  • 1 Garlic Clove, minced
  • ½ cup Dry Red Wine
  • 1 tsp Arrowroot Starch (or Corn Starch)
  • 2 tbsp Fresh Rosemary, chopped

Topping

  • 1.50 lbs Cauliflower Florets (you can make this easy on yourself and by riced cauliflower)
  • 2 Garlic Cloves, minced
  • 2 tbsp Butter
  • ½ tsp Salt
  • ¼ tsp Pepper
  • 4 oz Cheddar Cheese, grated

Instructions

Meat Layer

  1. In a large skillet over medium heat, brown the meat. Remove the meat from the pan and set aside. Drain most of the fat from the pan (leave enough to saute the onion!).
  2. Return pan to heat and add onion, salt and pepper. Cook until onion is translucent (about 5 minutes). Add garlic and cook about 1 minute.
  3. Put met back in pan with onion and garlic. Stir in arrowroot starch and wine. Cook until wine is mostly evaporated and juices start to thicken. Add chopped rosemary, stir well and remove from heat. Transfer to a 2 quart casserole dish.

Topping

  1. Preheat oven to 400F.
  2. Either use COOKED “riced cauliflower” or:
  3. Steam the cauliflower florets until they are very tender.
  4. Drain the riced cauliflower or cauliflower florets and place in blender or food processor. Add garlic, butter, salt and pepper. Blend until smooth.
  5. Spread the cauliflower mixture over the meat layer and sprinkle with cheese. Bake 20-25 minutes until meat layer is bubbling and cheese is melted.
  6. Turn broiler on high and broil 3-4 minutes to brown cheese. Remove and let sit for a few minutes before serving.


Nutrition

  • Serving Size: 8

Cheeseburger Calzone (Low Carb, Gluten Free)

Cheeseburger Calzone Recipe from That Vibrant Life
Print
clock clock iconcutlery cutlery iconflag flag iconfolder folder iconinstagram instagram iconpinterest pinterest iconfacebook facebook iconprint print iconsquares squares iconheart heart iconheart solid heart solid icon

Cheeseburger Calzone

5 Stars 4 Stars 3 Stars 2 Stars 1 Star No reviews
  • Author: Jessica Parker

Description

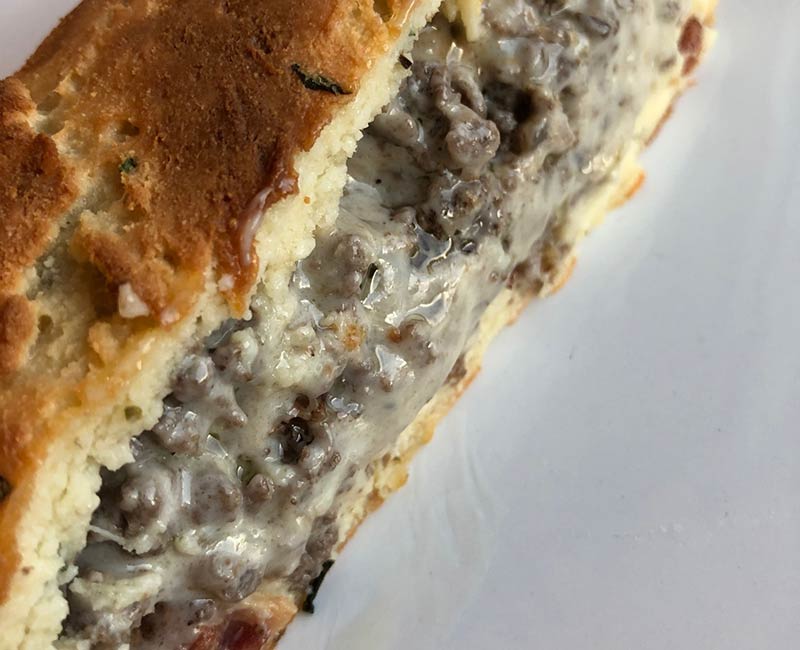
Cheesy goodness right here! This is the best low carb, gluten free comfort food! Obviously, you can use the “crust” and change up the filling to make whatever kind of calzone you would like. I actually made extra crust dough and made little biscuits out of the rest for snacks or as part of another meal. They are delicious warm with butter.

This also works perfectly as just a pizza crust. There are so many different low carb (keto) pizza crust recipes and I will say this is by far my favorite that I’ve made so far, and I have made MANY! You can also easily switch up the herbs and spices and create your own special flavor. I love Trader Joe’s “Everything but the Bagel” seasoning on things like this!


Ingredients

Scale

Crust

  • 4 cups Mozzarella Cheese, shredded
  • 4 oz Cream Cheese
  • 1 cup Coconut Flour
  • ½ tsp Dried Oregano
  • ½ tsp Dried Basil
  • ¼ tsp Dried Parsley
  • ¼ tsp Onion Powder
  • ½ tsp Garlic Powder
  • ½ tsp Salt
  • 4 Eggs, beaten

Filling

  • 6 Slices Bacon
  • 1.50 lbs Grass Fed Ground Beef
  • ½ tsp Onion Powder
  • ½ tsp Garlic Salt
  • ½ tsp Italian Seasoning
  • ¼ tsp Pepper
  • 6 oz Cream Cheese
  • ¼ cup Ketchup, no sugar added
  • 2 cups Mozzarella Cheese, shredded

Instructions

  1. Preheat oven to 425F.
  2. In a medium sized glass bowl, add the mozzarella and cream cheese. Microwave for 2 minutes, stirring intermittently. It should be soft and combined well when it’s done, no un-melted cheese.
  3. Whisk the flour and dried seasonings together in another bowl. Add the beaten eggs and combine well.
  4. Add the egg/flour mixture to the cheese mixture and mix well. It is best to wash your hands, roll your sleeves up and dig in so that you can incorporate everything well without struggling to stir the dough.
  5. Spread the dough onto a piece of parchment paper. Place another piece of parchment paper over it and roll the dough out with a rolling pin. Roll it out to your desired thickness.
  6. Transfer to a cookie sheet lined with a fresh piece of parchment paper.


Filling

  1. Cook the bacon and then crumble once cooled.
  2. Cook the ground beef until browned.
  3. Add all the rest of the ingredients to the meat (including the bacon) and cook until the cheese is completely melted and mixed into the meat.
  4. Place the meat and cheese mixture down the center of the pizza dough. Wet your hands to keep the dough from sticking to them and lift one side of the dough up and fold it over until you can seal the dough together in a half circle.
  5. Press the edges of the dough together with your fingers until it is sealed well.
  6. Bake for 20 minutes until golden brown.
  7. Let cool about 10 minutes before slicing and serving. Enjoy!

Jalapeño Popper Burgers

Jalapeño Popper Burgers Recipe from That Vibrant Life
Print
clock clock iconcutlery cutlery iconflag flag iconfolder folder iconinstagram instagram iconpinterest pinterest iconfacebook facebook iconprint print iconsquares squares iconheart heart iconheart solid heart solid icon

Jalapeño Popper Burgers

5 Stars 4 Stars 3 Stars 2 Stars 1 Star No reviews
  • Author: Jessica Parker

Description

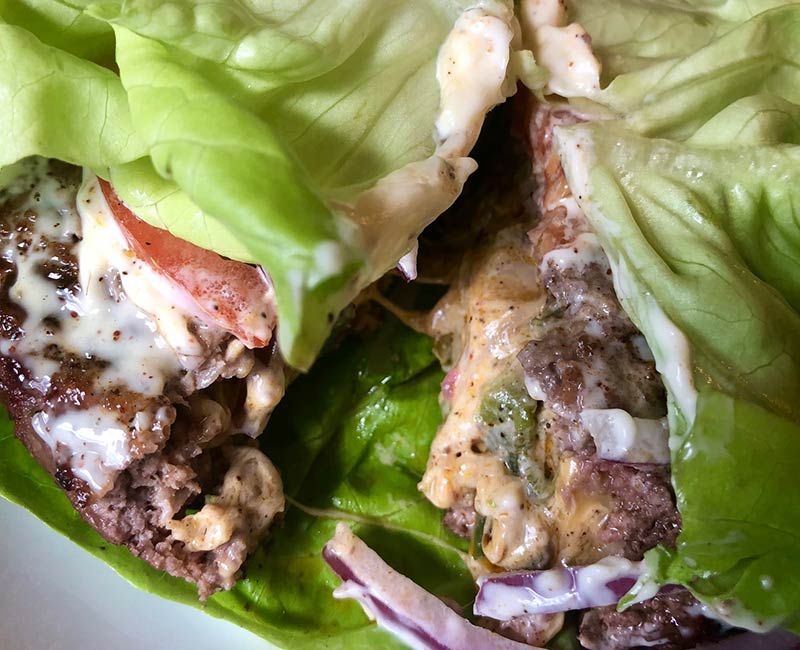
Okay keto people! This one is for YOU 🙂 This jalapeño burger is AMAZING….and messy…but mostly amazing!

If you are a little nervous about the jalapeño being too hot, just make sure to de-seed them well and you can cook them a bit before adding them to the burger to bring that heat level down a bit.

I highly recommend you use hormone free, antibiotic free, nitrate/nitrite free and grass fed and finished whenever you have such options with your animal products. Any of those attributes in your food will be part of your own system once you eat it. You don’t want that added inflammation, hormone imbalance, etc. to contend with!

This recipe is adapted from www.delish.com


Ingredients

Scale
  • 4 oz cream cheese, softened
  • ½ cup shredded cheddar
  • ½ cup mozzarella
  • 2 jalapeños, minced
  • salt
  • ground pepper
  • 6 slices bacon, cooked & chopped
  • ½ tsp chili powder
  • 1.50 lbs grass fed ground beef
  • butter lettuce, or large lettuce leaves of choice (for wraps)

Instructions

  1. In a medium bowl, mix together cream cheese, cheddar, mozzarella & jalapenos. Season with salt & pepper, then fold in cooked bacon.
  2. Form ground beef into 8 large, thin rounds (about 1/4″). Spoon about 1/4 cup of filling mixture onto one patty, then place a second patty on top. Pinch edges to seal burger. Repeat with remaining patties.
  3. Preheat grill to med-high. Season burgers on both sides with chili powder, salt & pepper. Place on grill & cook until done to your preference (should be around 6 minutes per side).
  4. Add whatever condiments you love and use your lettuce in place of a bun!


Nutrition

  • Serving Size: 4